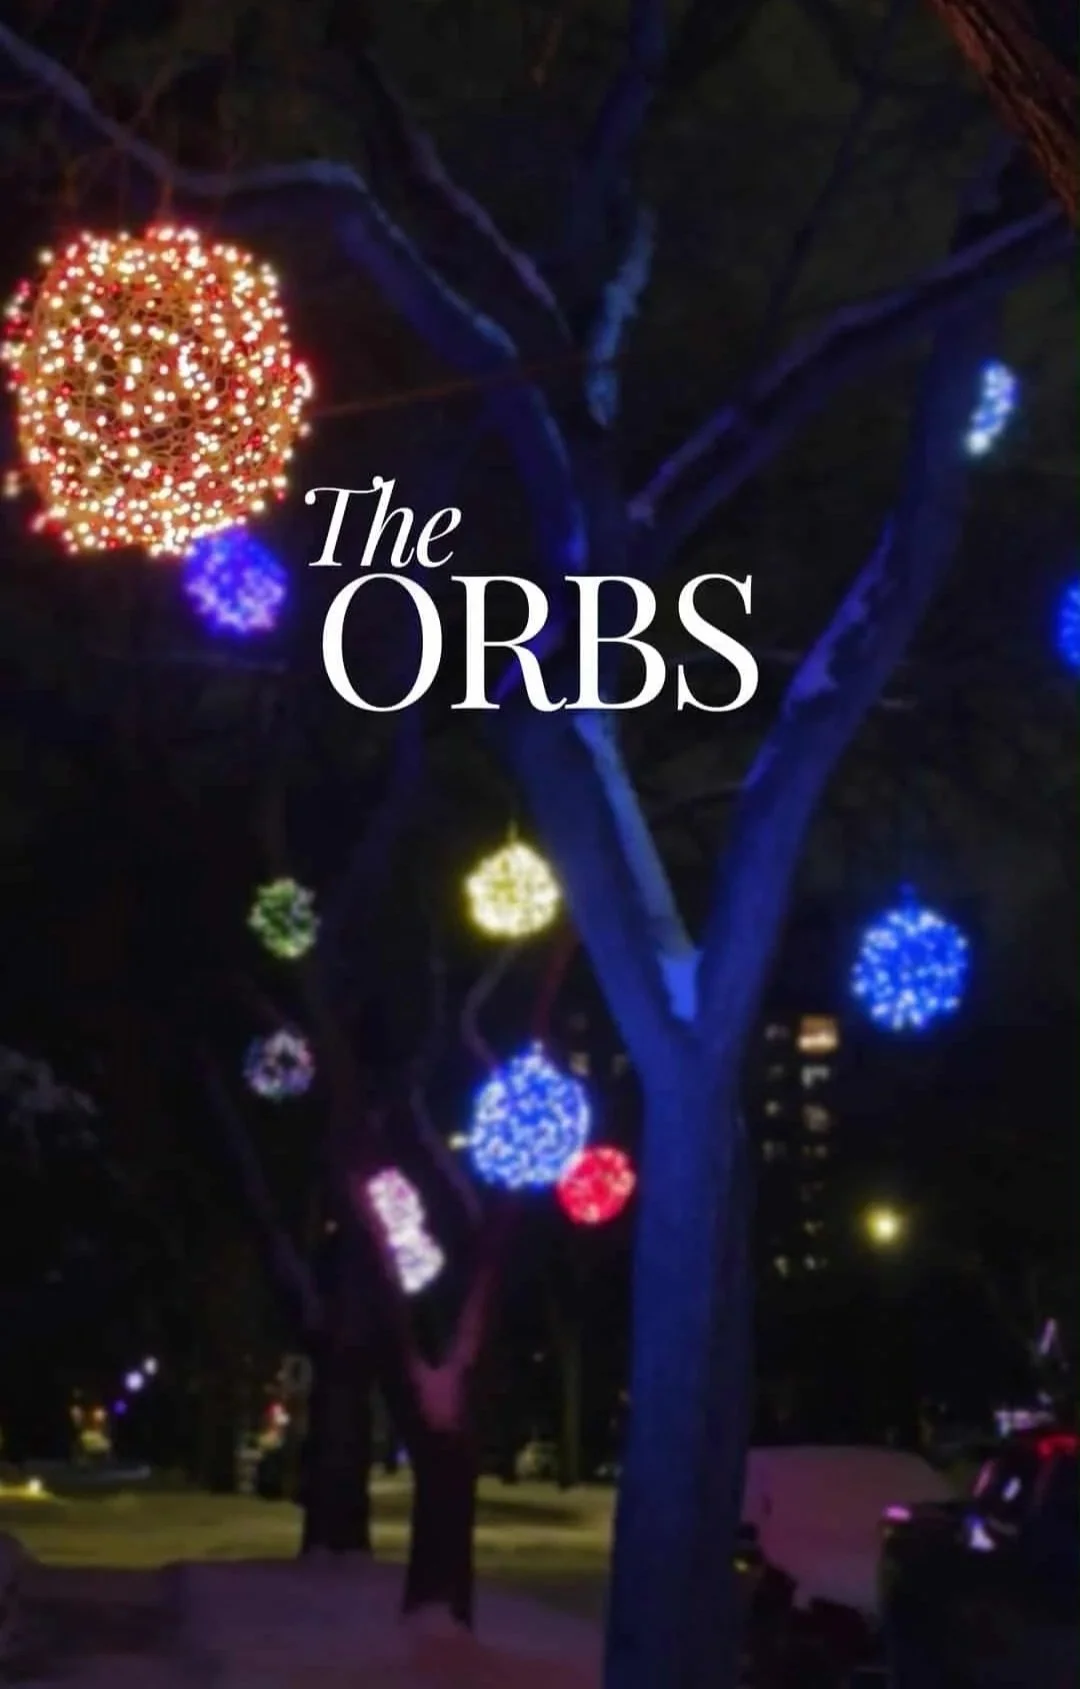
Christmas light orbs bring magic to Main Street... and to you! (DIY instructions included)
Every December, I share a few addresses of Christmas decorations that make me slow down, pull over, or add an extra block to my walk. It’s one of my favourite parts of the season, and I love crowdsourcing a little joy to discover what people are creating in their own neighbourhoods. This year as I’ve shared videos on my Instagram and Facebook, several readers messaged me the same thing: “Have you shared the orbs yet?” Everybody in & around Nutana knows these little spheres of twinkling lights!
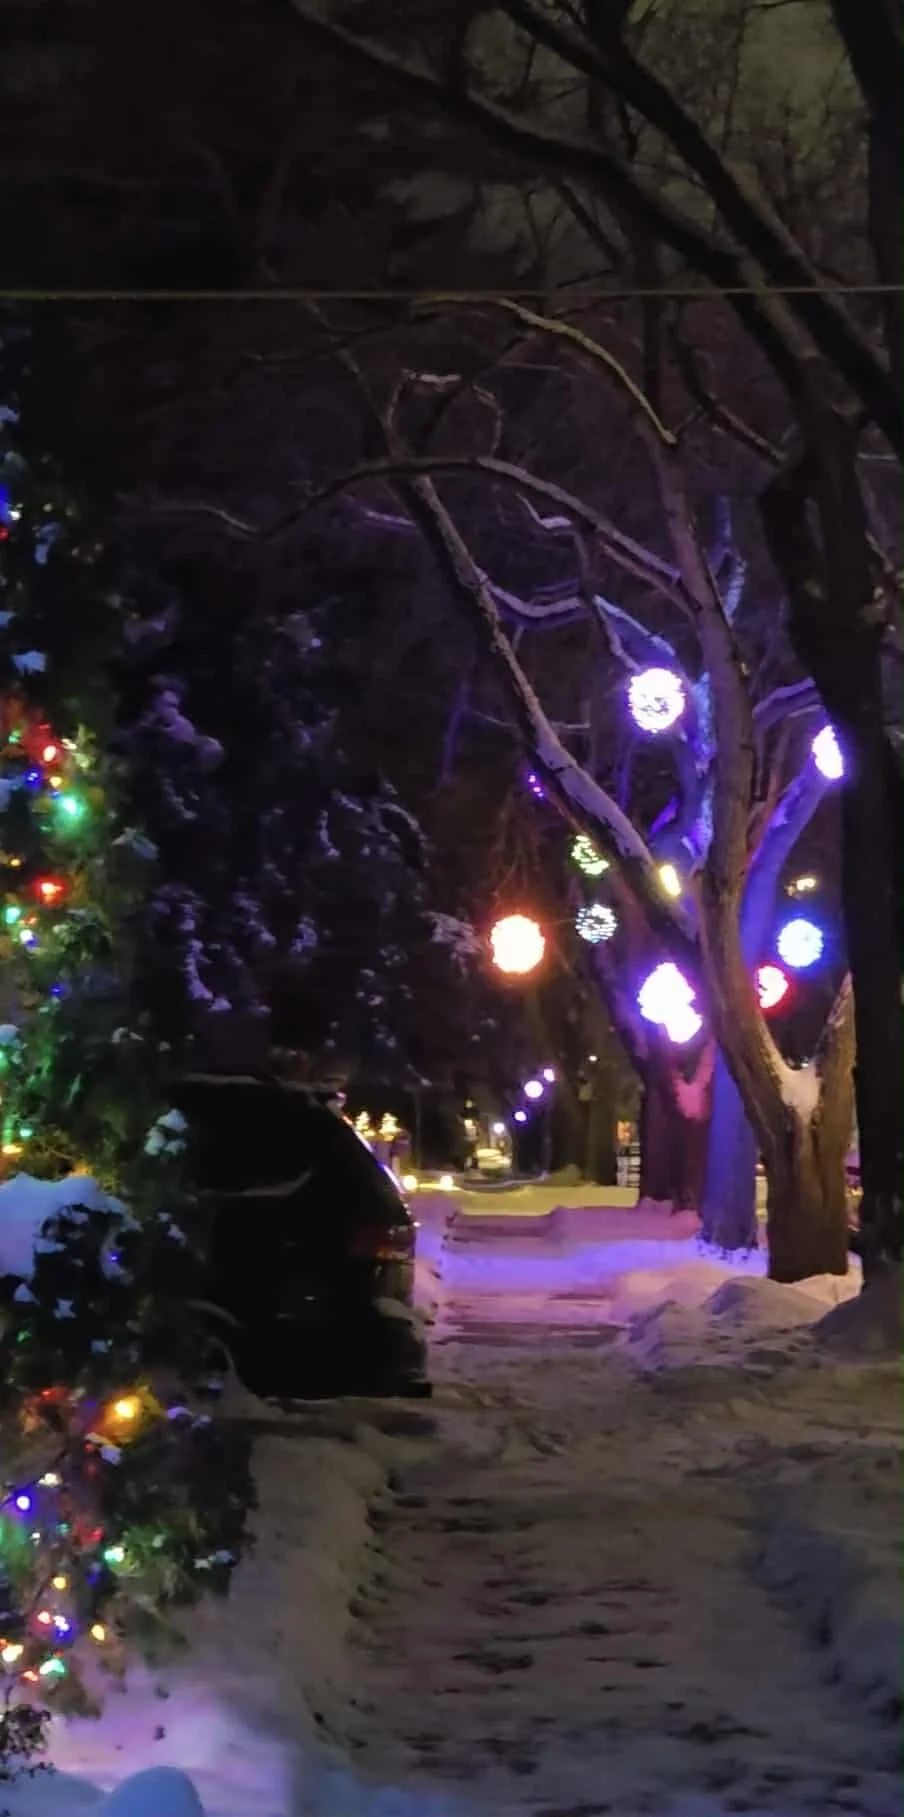
The Orbs on Main Street (but now well beyond it) are less of a display and more like an experience. Softly glowing spheres hanging from trees, gently lighting the sidewalk, each one handmade and completely unique. I spend a lot of time in that area so have watched them go from a handful to a phenomenon, though I never knew the story behind them. But a friend of mine told me, she lives just down from the person who started it all. So, I knocked on that door. And now, I’m sharing the lore with you.
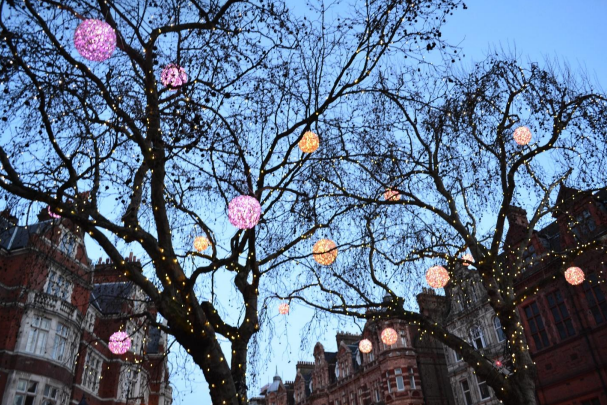
Anna Ringstrom, a Landscape Architect here in Saskatoon, started making the orbs during the first winter of Covid, having been inspired by those she’d seen in Carlos Square, London (pictured above). Like many of us, she was looking for ways to bring a little light into a heavy season. What began as a personal project quickly became something bigger. “I just wanted to make our block more appealing to pedestrians, and to make things a bit more cheerful during that first full Covid winter,” she explained. Her next-door neighbour soon joined in, and together they began gifting orbs to others on the block. They taught more neighbours how to make them, and before long, the glow spread… down the street, around the corner, and now you’ll find it throughout the neighbourhood.
There’s something special about the orbs that feels different from traditional Christmas lights. “I think people like the orbs because they’re all hand made, all different sizes, and they gently illuminate the sidewalk,” Anna said. “It’s been a lovely way to meet people, from my own block and from across the city.”
Anna has graciously passed along instructions on how to make your own orbs, which I’ll post below. I LOVE that she’s sharing this! How lovely that the orbs aren’t about exclusivity but rather community, creativity, and making winter a little warmer for strangers you may never meet.
You can find the orbs from the 700-1100 blocks of Main Street though now they’re hung throughout Nutana. Now you know that they started with one person, one block, and a desire to make things brighter. And they’re still doing exactly that. Thank you, Anna! And dear reader, this is your chance to create your own orb lane! Here are orb instructions, care of Anna:
How to Make Outdoor Pendant Globe Lights
Here are a couple of YouTube videos that might make it unnecessary to follow my written instructions:
https://www.youtube.com/watch?v=PSK5DRaPPlI
https://www.youtube.com/watch?v=dfoV294-JQw
SUPPLIES:
poultry wire
Exterior LED mini lights
extension cords
wire coat hooks
little bits of light wire or twist tie
TOOLS:
wire cutters
gloves
scissors
Notes regarding the above:
Poultry wire is available at most hardware stores. I have been buying it at Co-op Home Centre. It comes in rolls and I have been using the 2,’ 3’ and 4’ widths. It needs to be the 1” wire, as anything larger doesn’t have enough strength.
LED mini-lights can be difficult to find in the stores except around the Christmas holiday season. I usually buy them from Canadian Tire or Home Depot. Home Depot have them available online for delivery - handy if they run out of stock locally. I have experienced the best luck with NOMA brand lights and I use either the regular mini lights (like an elongated nipple) or the cluster lights (small, with a flat top). I do find a big difference in colours between the brands and between the different type of lights (NOMA warm white isn’t the same in the nipple tip vs. flat top). If you want to do a cluster of lights all of the same colour, I’d suggest buying plenty so you have a consistent colour.
Solar LED mini lights: I did not have much luck with solar lights at my house, where I was trying to install them in the trees on the north side of my house; the lights did not charge enough during the day to power the lights. I have a couple of trial lights in a tree that has sun exposure all day long and these are charging enough to power their strings for a few hours. The charging unit is a bit bulky and need to be wired in place or integrated into the top of the light ball.
Battery operated mini lights: I have not had luck with these during the winter. I suspect they would work well in the summer.
How many mini lights do I need? I find that a string of about 70 lights works well for an 8” ball, 100 for a 10” ball, 200 for anything medium size (12-18” diam.), 300 for a XL 24” and above. I find that a ball doesn’t look bad if there are too many lights but they don’t look so great if there are too few.
Extension cords: You will likely need a longer extension cord to get to the start of your installation. The lights, from this main power source, can be lit from one to another. If you are hanging them close together, look for the shortest exterior extension cord you can find, without a third grounding prong. The mini lights do not accommodate three prong cords. I have been finding the shortest, cheapest exterior cords (10’) at the Coop Home Centre (Woods brand).
Wire coat hangers: Once I used up all the wire coat hangers we had around the house, I actually had some trouble finding these, reflective of the fact we don’t get things dry-cleaned all that often. I cut these in half along the long side and bend the ends 360 degrees, hook them on either side of the ball to use as a hanger from which to suspend the ball. This doesn’t work well if you are trying to suspend the ball from something wide. I would like to figure out a way of making sturdy ‘S’ hooks from which to suspend the balls but so far have not found strong enough wire.
Little bits of wire: This is handy to secure the lights to the wire ball in a few places while you are wrapping the lights around the ball. Often the poultry wire comes wrapped in wire, save this for use to secure the lights. The mini lights also come bundled by twist ties; save this as well for securing These do not need to be heavy duty as the poultry wire is easy to cut.
Scissors: To cut off the white tags on the mini lights.
INSTRUCTIONS
1. Cut the poultry wire to the proper length. I am still working on recommended sizes but, generally, you want to cut about twice as much length as you have width. So, if you want to make a 2’ diameter ball, cut a 4’ width of 2’ wide netting. For smaller orbs, here is what has been working for me:
Very small orbs: about 8” diameter. Cut 24” role about 26” long, trim off about 8” of width.
Small orbs: cut 24” wide wire about 28” long, trim about 2-3” from width.
Medium orbs: about 12” diameter. Cut 24” roll about 36” long, trim 4” from width.
Large: 2’ diameter, as noted above.
XL: the largest orb I’ve made is about 30-36” diameter. I’ve been using the 36” wide wire for these and
Unfortunately, failed to note down how long a length I used (I recommend using the length should be 2x width formula to start). I believe that if you try to make an orb bigger than 36” diameter you would have to introduce more structure to the ball, in addition to the wire, so that it doesn’t become misshapen once it is hung.
2. Roll the wire into a tube. Use the cut ends of the wire to secure the ends of the tube together.
3. Trim the width of the tube if necessary.
4. Fold in the corners of one end of the tube. Use your wire cutter to cut the wire so that you can wrap the wire together. Repeat at the other end.
5. If the ball looks too long, press a row or two of poultry wire together.
6. Keep massaging the wire together until you have a ball shape, while occasionally clipping the wire to secure the wire into a firm shape. The more you massage and clip the overlapping wire tougher, the stronger the ball ends of being.
7. Choose a top for your ball and take the prong end of your lights, wrap it through the top of your ball. You do not want any pressure on the cord once it is hung. Wrap the lights once around the ball, use a small bit of wire to secure once you’ve gone around 360 degrees. Continuing wrapping the lights, occasionally securing to the ball (where the lights intersect, so you can secure more than one at the same point) until you’ve reached the end of the light string. Jointogether strings if you are making a larger ball. Tuck the end of the string outside the ball, so you can use it to connect power to the next ball.
8. Adapt the coat wire and secure to the ball. I usually try to do this where there are overlapping layers of wire, as these have more structural integrity.
9. Hang outside and enjoy!
Please note: Poultry wire is VERY forgiving and can be shaped into almost any shape you desire. Don’t be too worried about cutting the right size or having a misshapen shape. Just keep working and adjusting (stretching and contracting) and you’ll eventually end up with an orb.